Interaction in the Immersive 3D World
This section covers the ergonomics of immersive environments available to a user in such an environment, without using the interface of Accel VR Pilot 2019.2 or VSN player.
Creating an Immersive Sensation
Multiple elements work together to create a sensation of immersion for a user, including:
- System calibration,
- Shuttle position,
- Use of tracking devices,
- Appropriate preparation of the database to be used.
The user in an immersive environment is particularly sensitive to the position of his feet with regard to what he perceives as the ground in the virtual world. Make certain that his feet are on the same level as the virtual ground by positioning the exploration shuttle at the level of the ground.
Camera Animations
Camera animations, when they are available in your database, can be used to increase the immersive sensation in multiple ways. Depending on the experience you are aiming to create, different locks and camera animation options will be required.
Interaction Devices
Different devices help to improve your ability to interact with your surroundings as a user in an immersive environment.
It is possible to add in the immersive system a device that lets you interact with the virtual world such as a Fly Stick or the Apex by VICON. These devices allow surfaces to be indicated with a virtual laser beam. Based on the active interaction mode, you can then use the device's buttons to interact with the indicated surface or object.
For this to work, three conditions must be met:
- The model must have first been correctly configured in Patchwork 3D to have interactive components.
- A tracking system of the position and the orientation of the user's head.
- One or two tracked interaction devices (left hand and right hand).
You can then define your interaction device as being positioned 40cm below the head tracker, which will place it approximately as through it were held at stomach-level by an adult user.
Using the Interactive Menu
Using PieMenu system
Use the assigned button to display a menu in the 3D environment. The PieMenu is displayed one meter in front of the interaction device, in the direction that the device is pointing.
Two configuration options are possible:
- Assign the interactive menu and interactions to the same VR controller.
- Assign the interactive menu to a VR controller (right or left) and assign the interaction to another (right or left).
Use the buttons or the axis (triggers or sticks) you previously set up in the VRPN devices management in order to:
- go to the next interaction,
- go to the previous interaction,
- choose the options,
- start an interaction.
Using the MoveNAct menu
The operation of the MoveNAct menu has been designed for two-handed use.
The immediate assignment allows you to combine multiple interactions at the same time. Please see Move and Act bindings tab for more information.
Whatever the chosen interactive menu (PieMenu or MoveNAct) all possible interactions are present.
Navigate through the menu and select features below.
 Configuration
Functions available in the floating menu are:
- Apply Similar Products (On/Off)
- Cycle bookmarks (On/Off)
 Animation
When Play Reverse function is on, you can interact with animation to play it in reverse mode (animation return to its initial state).
 Interest point
Interest point allows you to point an area that you need to focus on like a pointer during a slide presentation.
See details in the section of the Interest point management.
 Grab world
Grab world allows to move the world with a VR controller.
Functions available in the floating menu are:
- Lock Altitude (On/Off)
- Lock Horizon (On/Off)
 Spotlight
The interaction device functions as a spotlight to light the shadowed areas of your models. Point at the dark areas to shine the light at them.
Functions available in the floating menu are:
- Color (White, Hot, Cold)
- The radius of the lighting (small, medium
 Manage clipping planes
Functions available in the floating menu are:
- Manage clipping plane (Plane 1)
- Manage clipping plane (Plane 2)
- Manage clipping plane (Plane 3)
- Free mode (On/Off) lets you move the clipping plane in the space without any axis restrictions.
See details in the the Clipping planes management section.
 Snapshot
This interaction allows you to snapshot a scene in VR according to the operator point of view.
 Measure tools
Measure tools function allows you to measure the distance between two points and compute an angle.
Compute angles allows you to calculate an angle between two opposite points.
Please refer to Measure tool management section for more details about its operating mode.
 Turntables
Turntables in VR have the same actions than the Pilot View. Please refer to the Links for more information.
 Targeted navigation
Targeted navigation allows you to target the location from which the shuttle will rotate.
Functions available in the floating menu are:
- the direction of the rotation (Clockwise, Anticlockwise)
- the rotation speed (Slow, Moderate, Fast)
 Select part
Select part allows you to select multiple parts that directly interact on Move part, Reset transform and FFD Deformer functions.
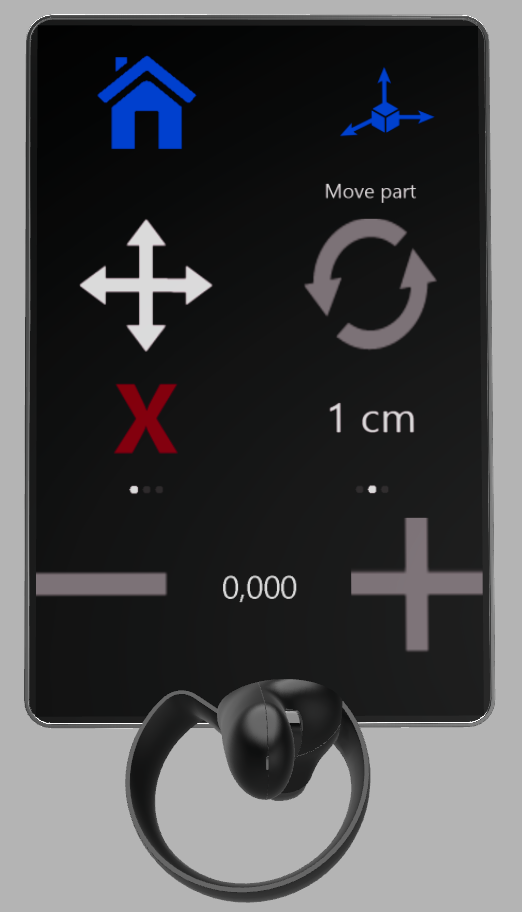
 Move part
Move part allows you to grab and move surface with device's trigger.

Figure 27 : Move part interactive panel
| Icon | Action | Description |
|---|---|---|

|
Translate | Moves the surface by a translating movement depending X,Y,Z axis you have chosen. |

|
Rotate | Rotates the surface depending X,Y,Z axis you have chosen. |
| 5° | Tilt | Tilts the surface by a preselected factor degree. |
  |
Decrease / Increment | Decreases or increments the surface position. |
Functions available in the floating menu are:
- Lock X (On/Off)
- Lock Y (On/Off)
- Lock Z (On/Off)
- Lock orientation (On/Off)
Reset transform
This function allows you to return the selected surfaces to their original transformation as they were when the file was opened.
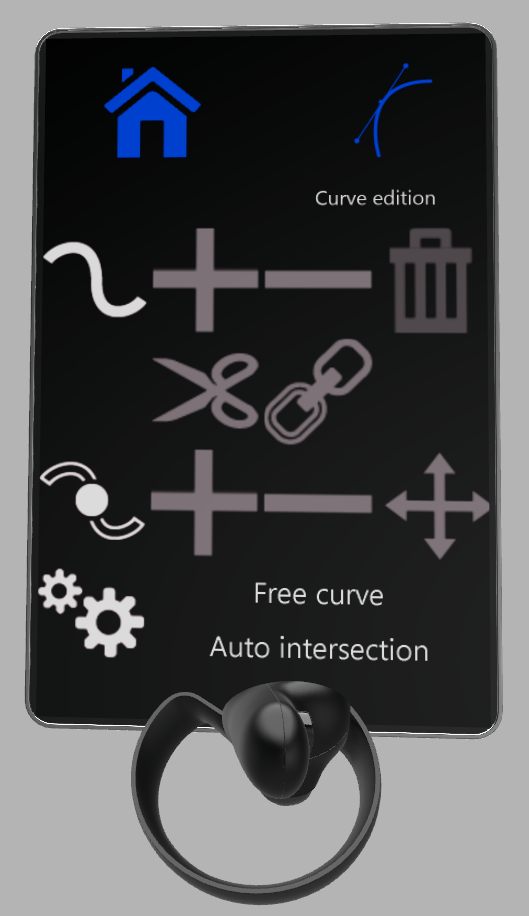
 Curve edition
This panel allows you draw and edit curves that can be exported to several 3D software compatible files.

Figure 28 : Curve edition interactive panel
 Show / Hide products
This function allows you to show or hide product(s). This function is also available in the The Scene tab.
 Show / Hide surfaces
Displays or hides surfaces individually.
The surface mesh (wireframe) in green color informs you that the surface remains visible.
The surface mesh becomes red to inform you that the surface is going to be hidden when you will close this function.
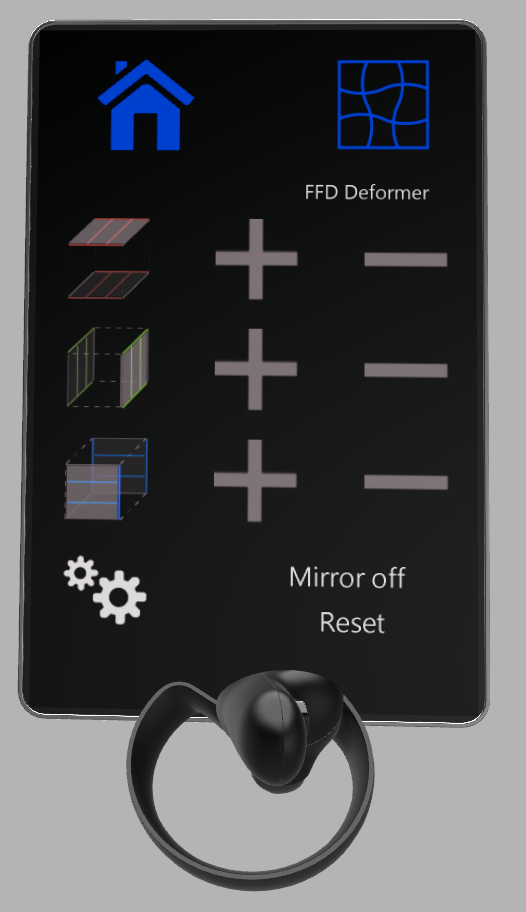
 FFD Deformer
Free Form Deformation (FFD) panel allows to modify the geometry of one or several surfaces by applying a FFD deformation such as Autodesk Maya®.

Figure 29 : FFD Deformation panel
| Label | Action | Description |
|---|---|---|

|
Add or decrease | Increases or decreases surface division number on X axis. |

|
Add or decrease | Increases or decreases surface division number on Y axis. |

|
Add or decrease | Increases or decreases surface division number on Z axis. |
|
|
||
| Mirror off | Symmetrically duplicates the number of surface division when you deform an object (feature must be On). | |
| Reset | Reset all changes. | |
 Material assignment
This function allows you to assign a material to a pointed surface by selecting it from a directory tree previously loaded. If this surface belongs to the selection, all surfaces of the selection will have the same material. See details in the CAD Tools management paragraph.
 Common parts import
This function allows you to add models from a directory tree previously loaded. See details in the CAD Tools management chapter paragraph.
 Image
Image
This function allows you to display an image (picture, sketch, etc...) in order to use it as drawing template to compare your 3D model with this image. Pictures can be load from a directory tree previously loaded. See details in the CAD Tools management paragraph.


