Bézier Curve Primitives
- Create Bézier path

- Show Bézier Paths Editor

Patchwork 3D Design Bézier curves are supports for camera and camera target paths in animations. The camera, its target, or both can be animated along any existing curve in your product.
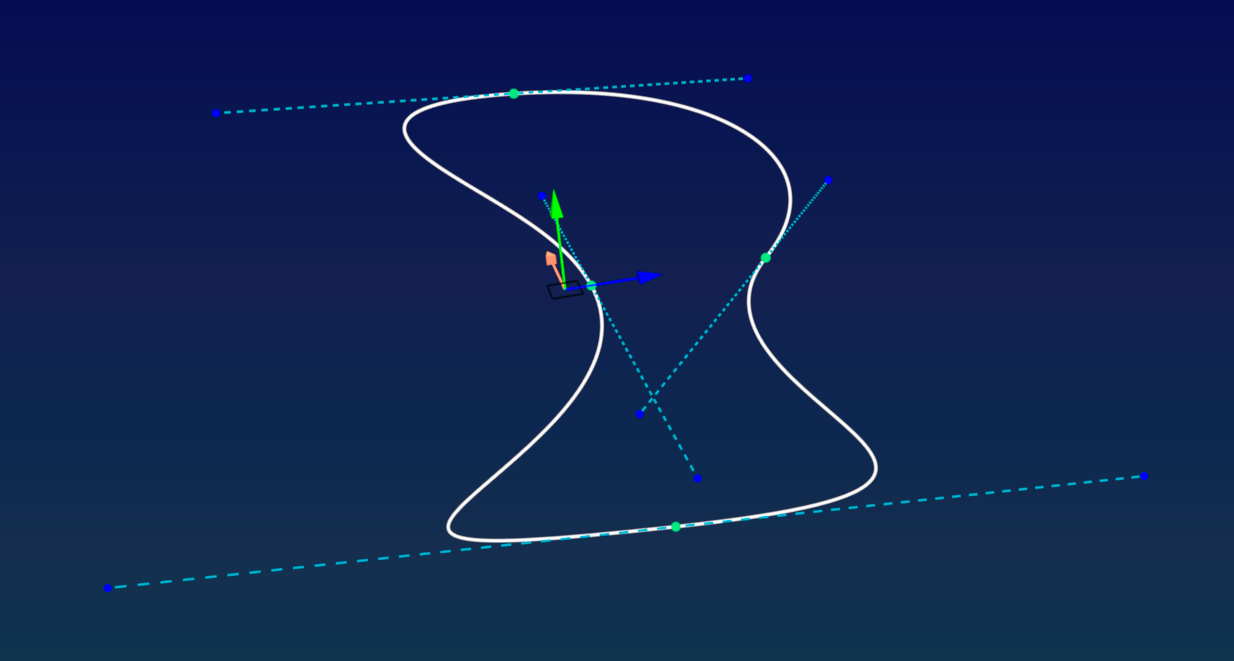
The simplest form of a Bézier curve is a curve calculated between two control points. The shape of the curve is manipulated by modifying the position of the tangents running through these control points. The Bézier curves in Patchwork 3D Design consist of two or more points, with a curve passing through each pair of points. This chain may have two endpoints (an open curve) or the two ends may meet and join together (a closed curve).
When creating a Bézier curve, you provide the following information:
- The name of the curve being created.
- The number of points to position along the curve. You can also add or delete points later.
- Whether the curve will be an open or a closed shape. Select Closed Path to create a closed curve. This property may be modified later on.
The curve that is created is placed on the grid. An open curve will be placed aligned on the X axis. A closed curve is placed so that its points are positioned equidistantly on an invisible circle centered on the origin in the 3D world.
Modifying a Bézier Curve
You can Display ![]() or Hide
or Hide ![]() Bézier curves using the toolbar toggle button. Bézier curves are visible by default.
Bézier curves using the toolbar toggle button. Bézier curves are visible by default.
Modifying a Bézier Curve via the contextual menu
A single click selects the curve. When the curve is selected, the various points and tangents along the curve are displayed.
Right-click on a curve to open the curve's context menu. From this menu you can:
A point can also be added to the curve by Alt+clicking on the place on the curve where you wish to add a new vertex. An existing point can be deleted by right-clicking on it and choosing ![]() Delete point from the context menu.
Delete point from the context menu.
Modifying a Bézier Curve via the editor
From the Bézier Paths Editor, you can:
| Icon | Function | Action |
|---|---|---|
|
|
Show Bézier Path |
Hides or shows Bézier path in the 3D Viewport. Process to change simultaneously the state of several Bézier paths. From Bézier Paths Editor, right click on the selection and then click Show/Hide
|
|
|
Hide Bézier Path | |
|
|
Freeze Bézier Path |
Freezes or unfreezes the selected Bézier Path. Process to change simultaneously the state of several Bézier paths. From Bézier Paths Editor, right click on the selection and then click Freeze/Unfreeze
|
|
|
Unfreeze Bézier Path | |
|
|
Add a path | Adds a path a Bézier path into the 3D Viewport. |
|
|
Hide/Show Bézier Paths | Hides or shows Bézier paths in the 3D Viewport. |
|
|
Import Bézier Path(s) | Imports one or multiple Bézier paths from the hard drive of your computer. |
| Export Bézier Path(s) | Exports one or multiple Bézier paths into the hard drive of your computer. | |
|
|
Rename Bézier Path | Renames a Bézier path. |
|
|
Delete Bézier Path(s) | Deletes one or multiple Bézier paths. |
Bézier Curve Position and Orientation
The position and orientation of the curve, as well as those of its points and tangents, can be modified using the translation and rotation gizmos.
- Use the translation or rotation gizmos to manipulate the entire curve if no specific point or tangent is selected.
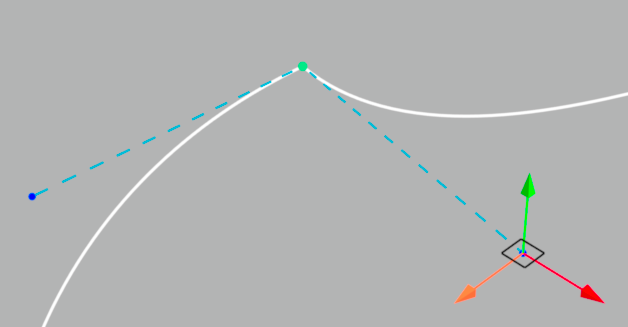
- When a point is selected, the translation gizmo moves the point in the 3D space; the rotation gizmo changes the orientation of its tangent.
- When a tangent's endpoint is selected, the translation gizmo moves the endpoint in the 3D space; the rotation gizmo has no effect.By holding down the Ctrl key of the keyboard you can move the direction point (end of the tangent) regardless of the other direction point.
By holding down the Ctrl + Shift keys of the keyboard you can change the length of one side of the tangent while keeping the same axis for both sides.
