Rendered Views History
Available in: Matter: Editors > |

The Rendered Views History is a tool available to compare several views of products in Patchwork 3D. It saves rendered views, displays them as miniature images, and restores their original size. It shows views taken of any of the products in a database.
The views are saved as soon as they are added to the Rendered Views History.
To select a view in the Rendered Views History, click on the corresponding miniature. Several views can be selected at once.
By holding down the Shift key (for a continuous selection) or the Ctrl key (for a discontinuous selection).
By holding down the left mouse button and drawing a rectangle over the desired views.
Note
The Rendered Views History in Patchwork 3D also loads the views rendered with the Raytracing editor from versions 5.2 to 5.4.
Operations Toolbar
This toolbar located at the bottom of the Rendered Views History provides the tools to manage the views in the history.
Icon | Function | Description |
|---|---|---|
| Add rendered view | Saves the view in the active viewport to the history. |
| Export views | Allows the selected views to be exported by saving each view as a separate image file. When this button is clicked, it opens the Export images dialogue box. |
| Reload view bookmark | Repositions the camera in the active viewport to the position that was used to create the selected view. |
| Rename rendered view | Allows the view to be renamed. Each view must have a unique name. If the user enters a name that has already been assigned to another view in the history, the Rename rendered view function will add a number to the end of the duplicate name: Product (1). |
| Delete selected views | Deletes the selected views. |


The Export images dialogue box shows a list of the selected views, the choice of the directory where the files will be saved, and the choice of file format to be generated.
Some of these operations are available in the context menu that is accessed by right-clicking on a view. The actions chosen from the context menu affect only one view at a time.
From the context menu, you can Export view, Reload view bookmark, Rename view or Delete view.
Engines Used for Rendering
The view image is rendered by the engine used to calculate it in the active viewport. If any part of the active view is calculated by raytracing, the image will be rendered by the raytracing engine. However, if the view is calculated by the OpenGL engine, the image will be rendered by this engine.
The engine used to render the view (OpenGL or Raytracing) is indicated on the upper part of the thumbnail.
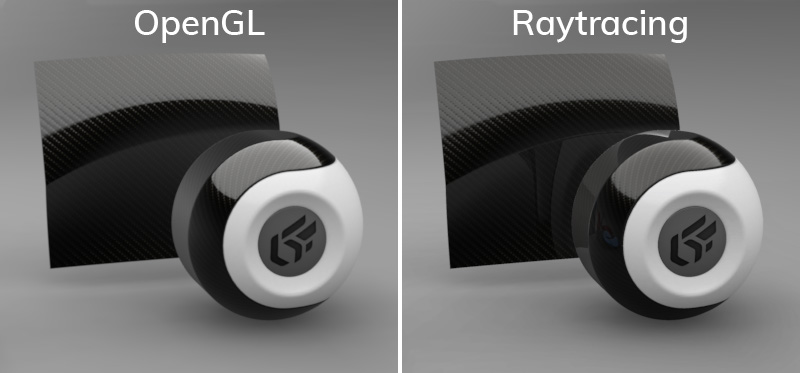
Indication of rendering engine on thumbnails (OpenGL engine on the left; raytracing engine on the right).
Note
The raytracing engine can be set up to automatically add views rendered by raytracing to the Rendered Views History.
Click on the button  Raytracing settings on the toolbar Editors or navigate in Editors > Raytracing settings. An option in the Viewport Raytracing box allows the Automatically add to Rendered Views History on render option to be activated or deactivated. This option is disabled by default.
Recalling a View
Double-clicking on a view will recall it in the active viewport. The size of the original image is restored and the viewport is resized accordingly.