Installing the Lumiscaphe add-on
Prerequisites
Note
It is necessary to have the version 4.0 Or 4.1 of blender installed on your computer to be able to run the Lumiscaphe add-on.
Installation
This installation allows you to have the Lumiscaphe add-on loaded and available each time you launch Blender, without having to run a script to launch it.
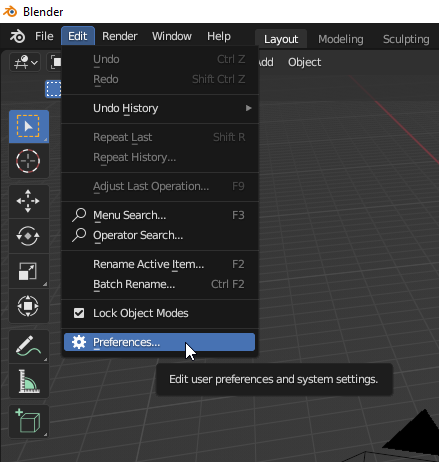
Open the Blender add-on installation window located in the menu Edit > Preferences.
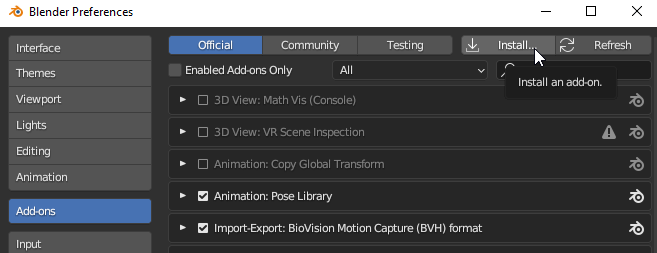
In the Preferences window that opens, select Add-ons on the left part and click on the Install button at the top right of the window.
Choose the add-on's zipped folder, for example
P3DToBlender-3.1.0.zip, and click the button Install Add-on at the bottom right.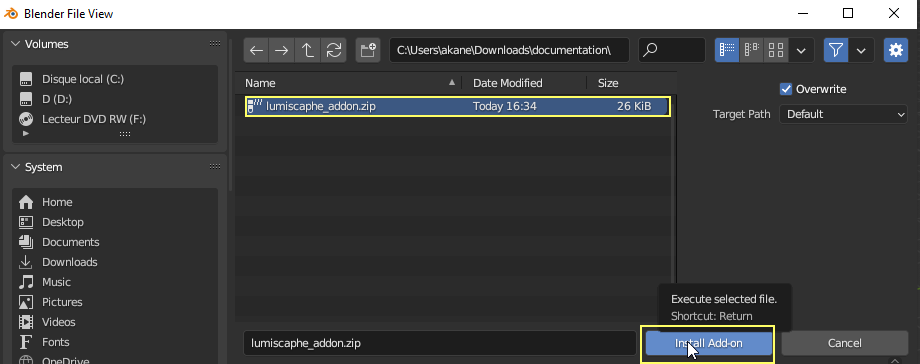
Wait until the Lumiscaphe add-on is correctly installed.
The Blender preferences window may automatically close at the end of its installation. If so, open Blender preferences again via the menu Edit > Preferences.
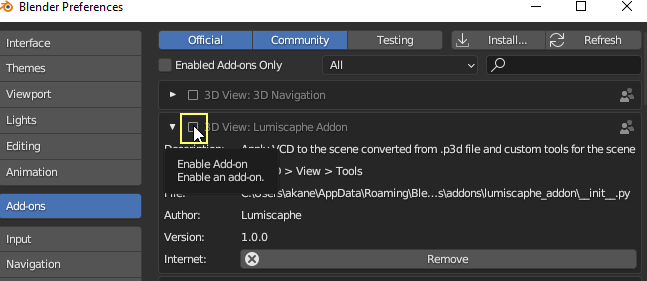
The Lumiscaphe add-on should appear in the list, check the box corresponding to the add-on to enable it.
Uninstalling the add-on
Open Blender.
In Edit > Preferences > Add-ons button, look for the add-on titled Lumiscaphe Addon.
Expand the add-on to reveal the Remove button.
Click the Remove button.