Iray settings editor
Scene tab
Tip
How does refinement work?
The Iray rendering engine refines the image continuously to improve quality. The Refinement stop criteria parameter is used to define the calculation limit. The Max samples per pixel parameter determines the number of rendering passes allowed for the calculation of the image. It is also possible to put a time limit.
Iray will then stop calculating the image if it reaches one of the limiting parameters, either the number of passes or the maximum time.
Tip
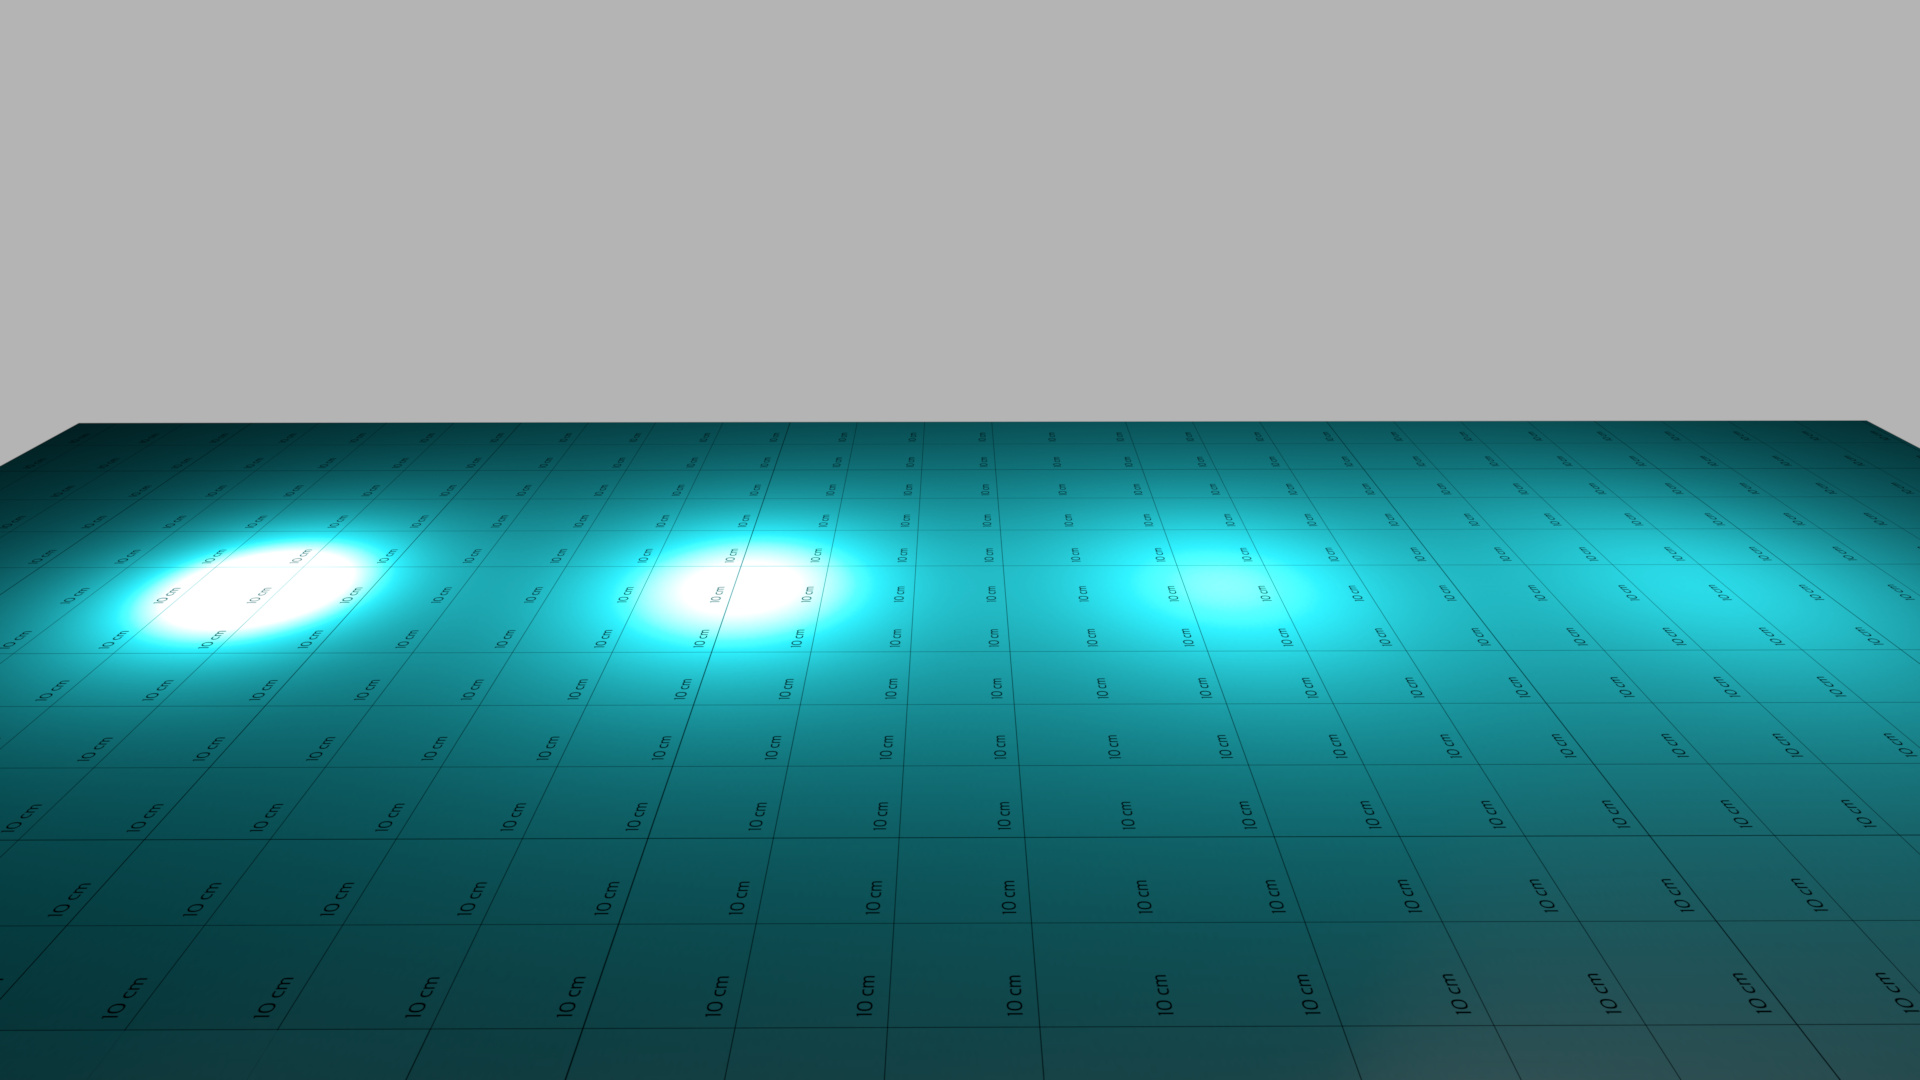
What is the Fireflies parameter used for?
Enabling the Fireflies parameter allows you to clear light spots that may appear during the calculation. In order to make this parameter works, it is necessary to check also the Degrain Filtering.
Tip
What is the Denoise Filtering parameter used for?
The parameter Denoise Filtering reduces the noise in the image from a given number of iterations. This setting should not be used if the scene has materials with very fine details, such as flakes of a Car paint material, or very small grain plastics, noise reduction would erase these details.
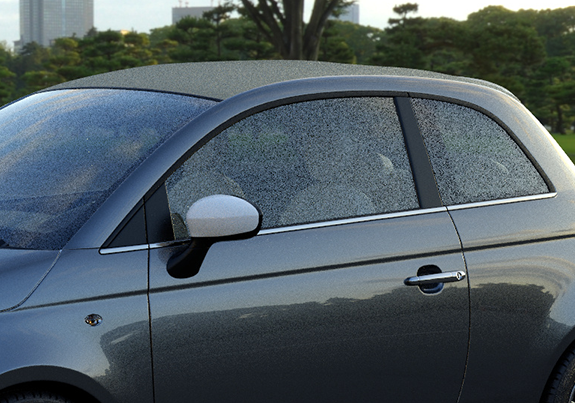 Denoise filtering disabled | 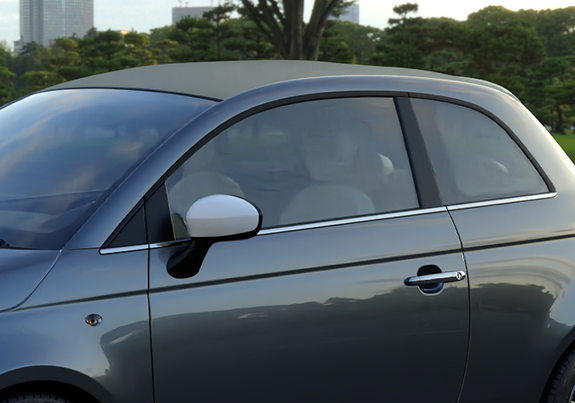 Denoise filtering enabled |
Tone Mapping Tab
Tip
What is the Exposure parameter used for?
The Exposure parameter (default: 7) allows you to underexposed or overexposed the rendering, as you would do with a conventional camera. Do not hesitate to modify this parameter according to the environment applied in the scene, to bring more or less light into the lens.
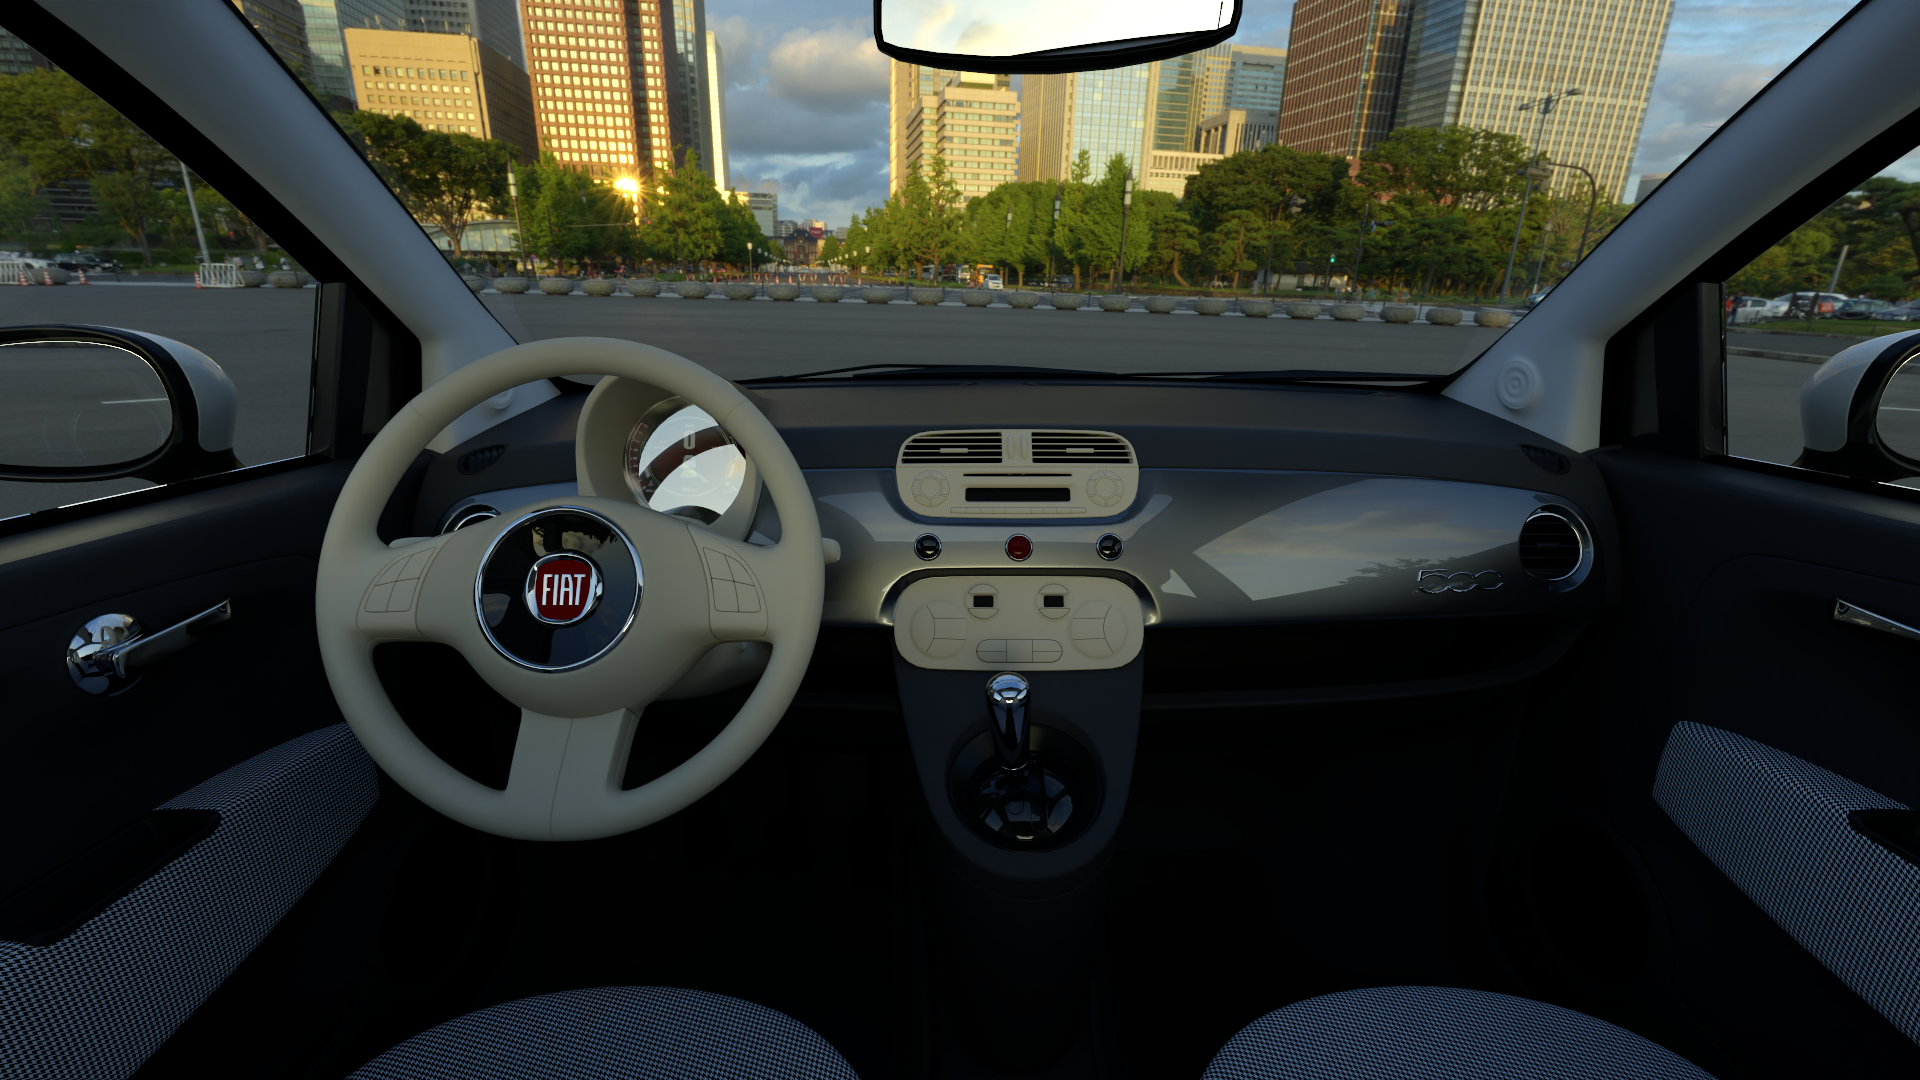 EV (Exposure Value): 7 | 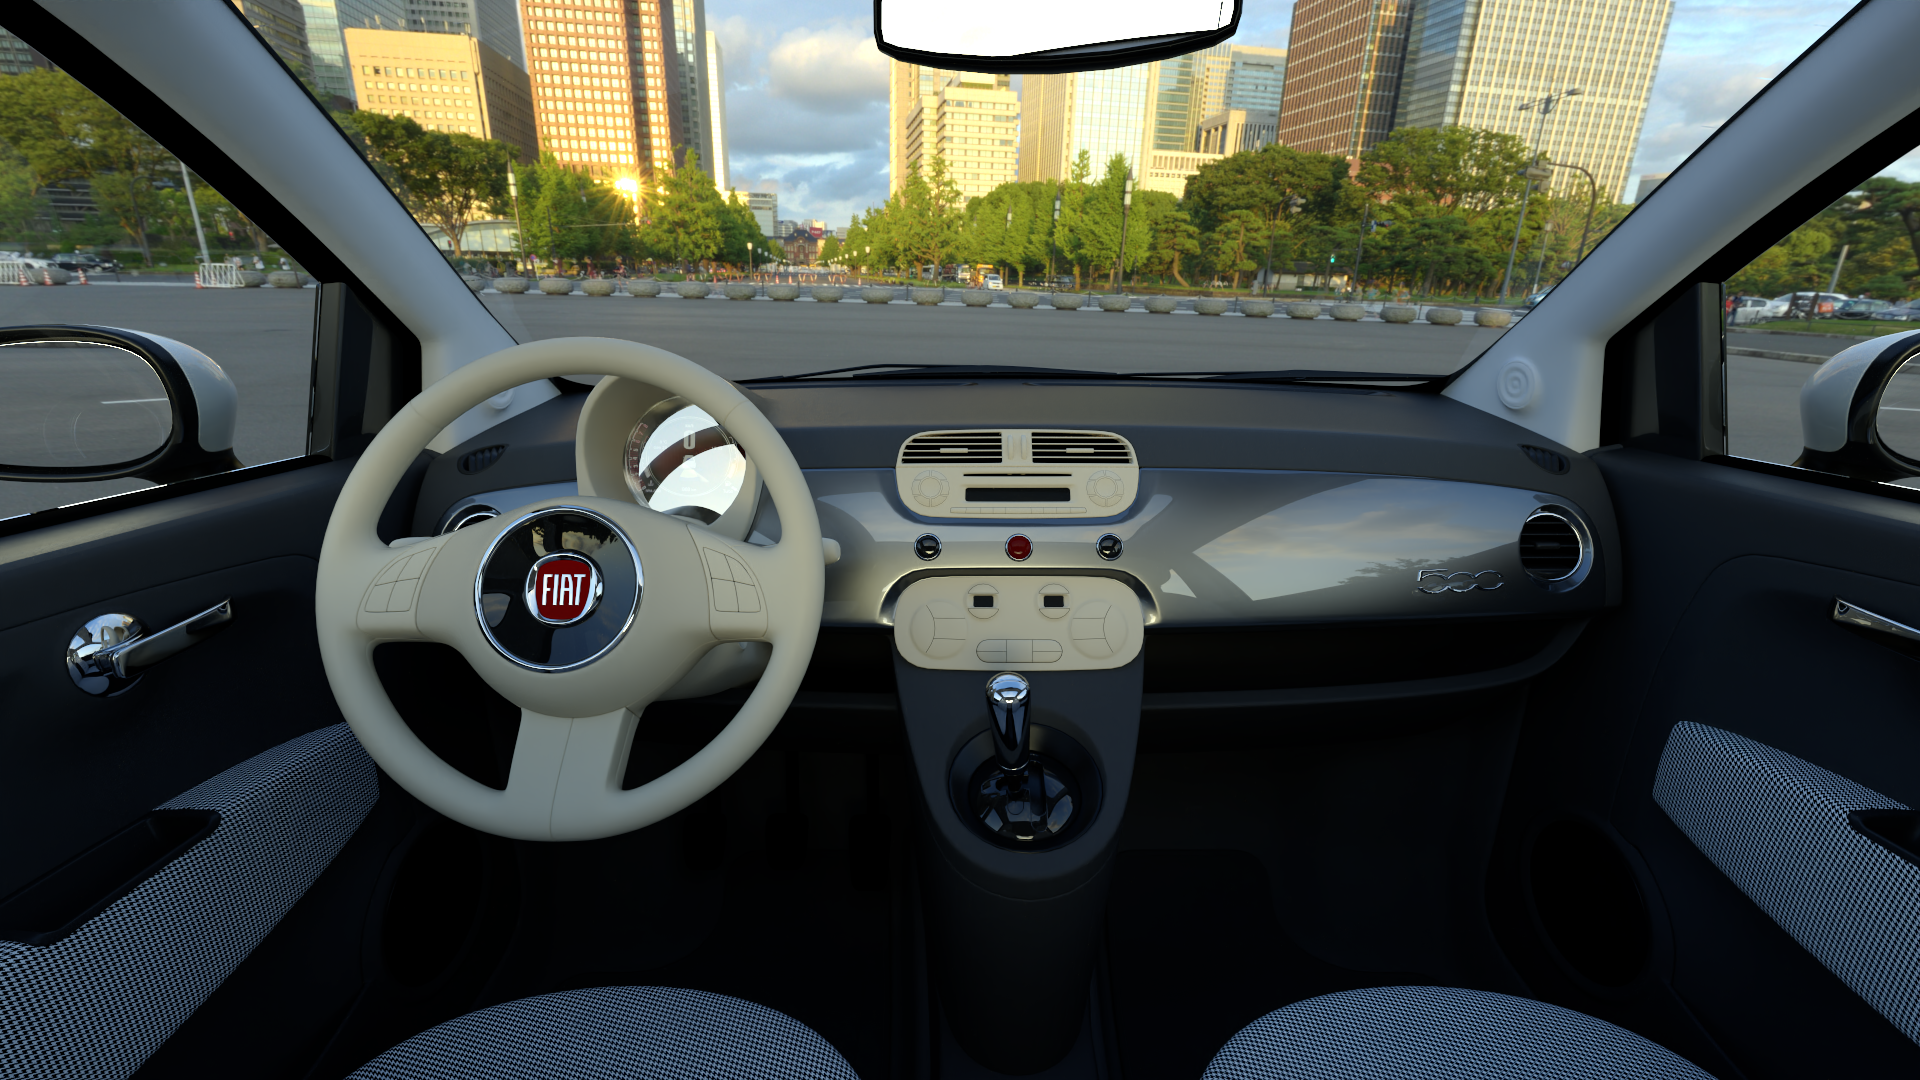 EV (Exposure Value): 8 | 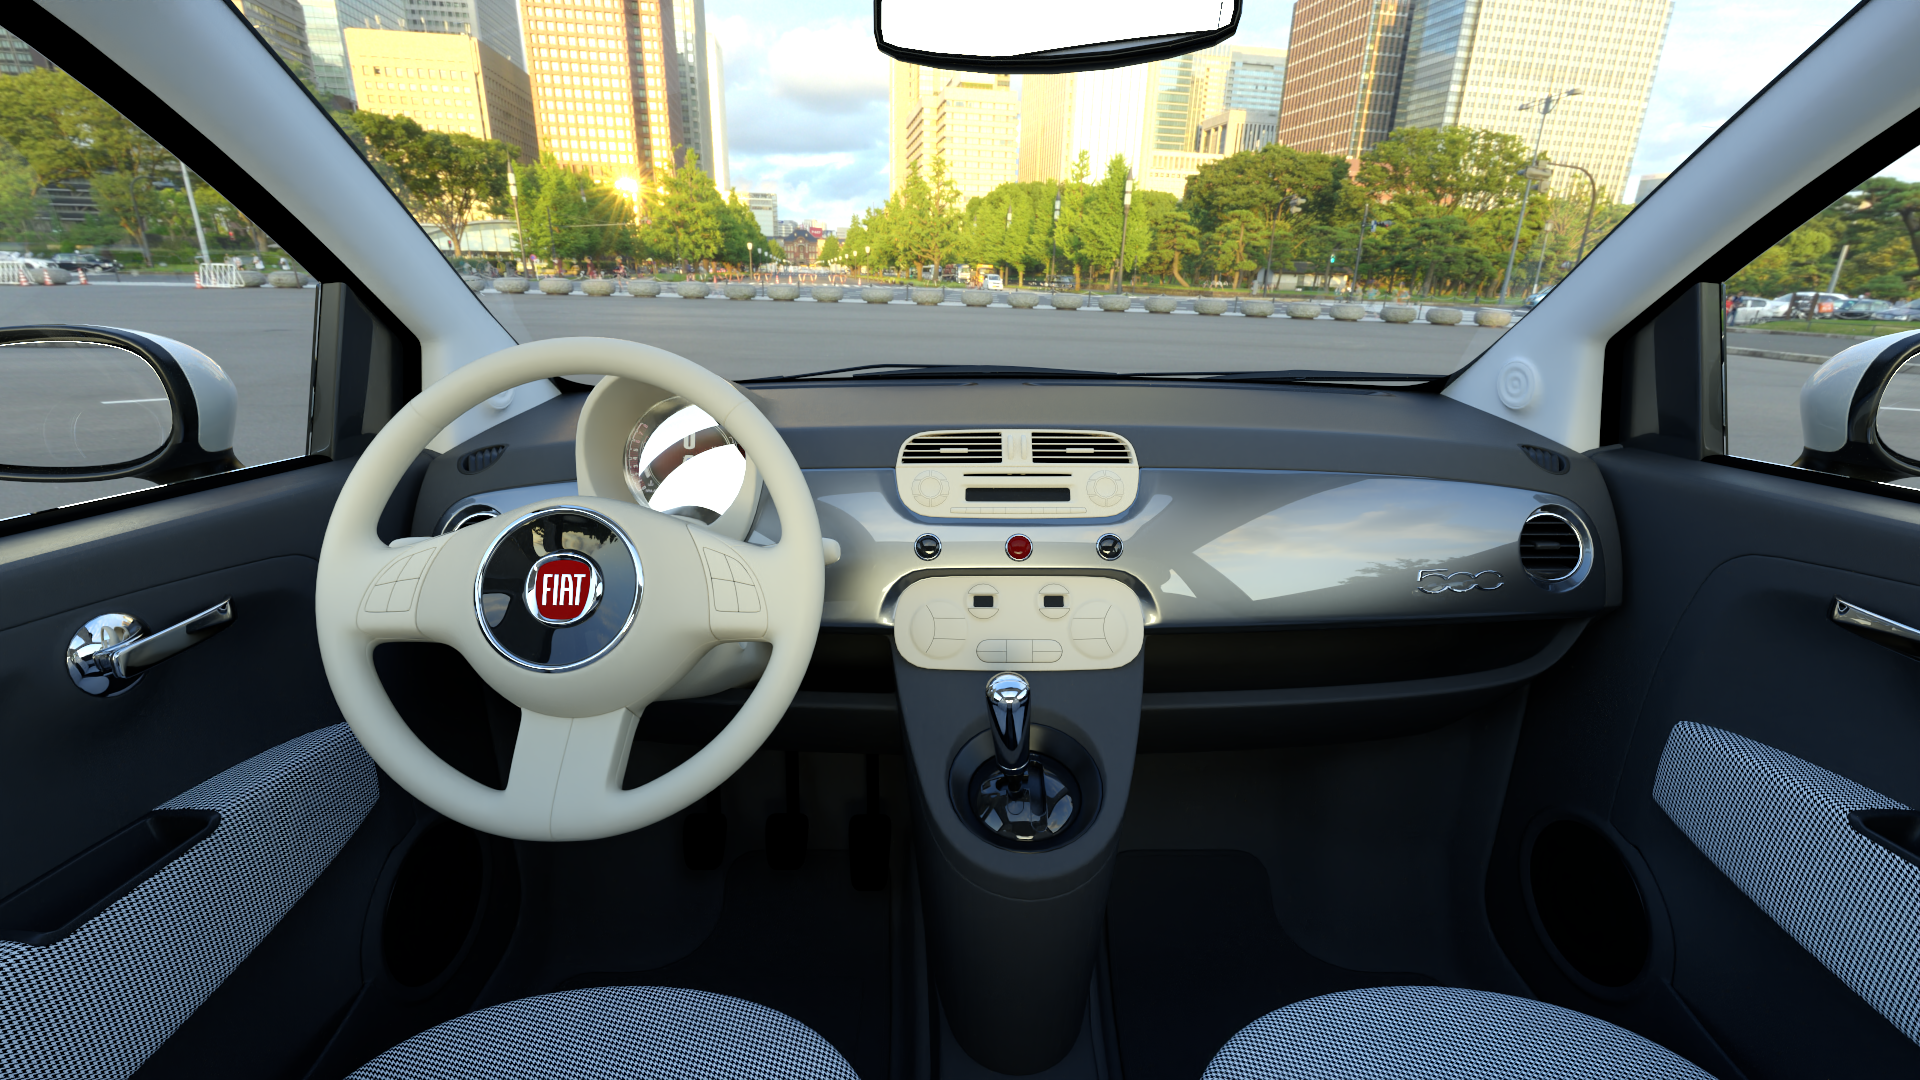 EV (Exposure Value): 9 |
Materials Tab
Tip
What is the use of overriding a material in Iray and how to do it?
It is possible to override a material with another one in the Materials tab of the Iray settings. You can replace assigned material onto surfaces in OpenGL by another material when rendering with Iray. To do this, simply check the box Override with the material, then choose the material you want to use. It is possible to override an OpenGL material with a .kmt, .axf, or .mdl material.
Tip
How to create a shadow material with more features than Patchwork 3D?
Tick the Use as matte material checkbox to transform a standard material into a matte material and display only shadows and specular reflections on the surfaces that have this material. This allows for a reflection of the product on the ground, as well as these shadows.
Lighting tab
Tip
How to compensate for the lighting differences between OpenGL and Iray?
OpenGL engine lights do not have the same rendering in Iray. The result in OpenGL gives a weaker illumination in Iray.To correct this, in the Lighting tab of the Iray settings, it is possible to override the intensity of the lights to make them brighter.
 OpenGL illumination with intensity 1 | 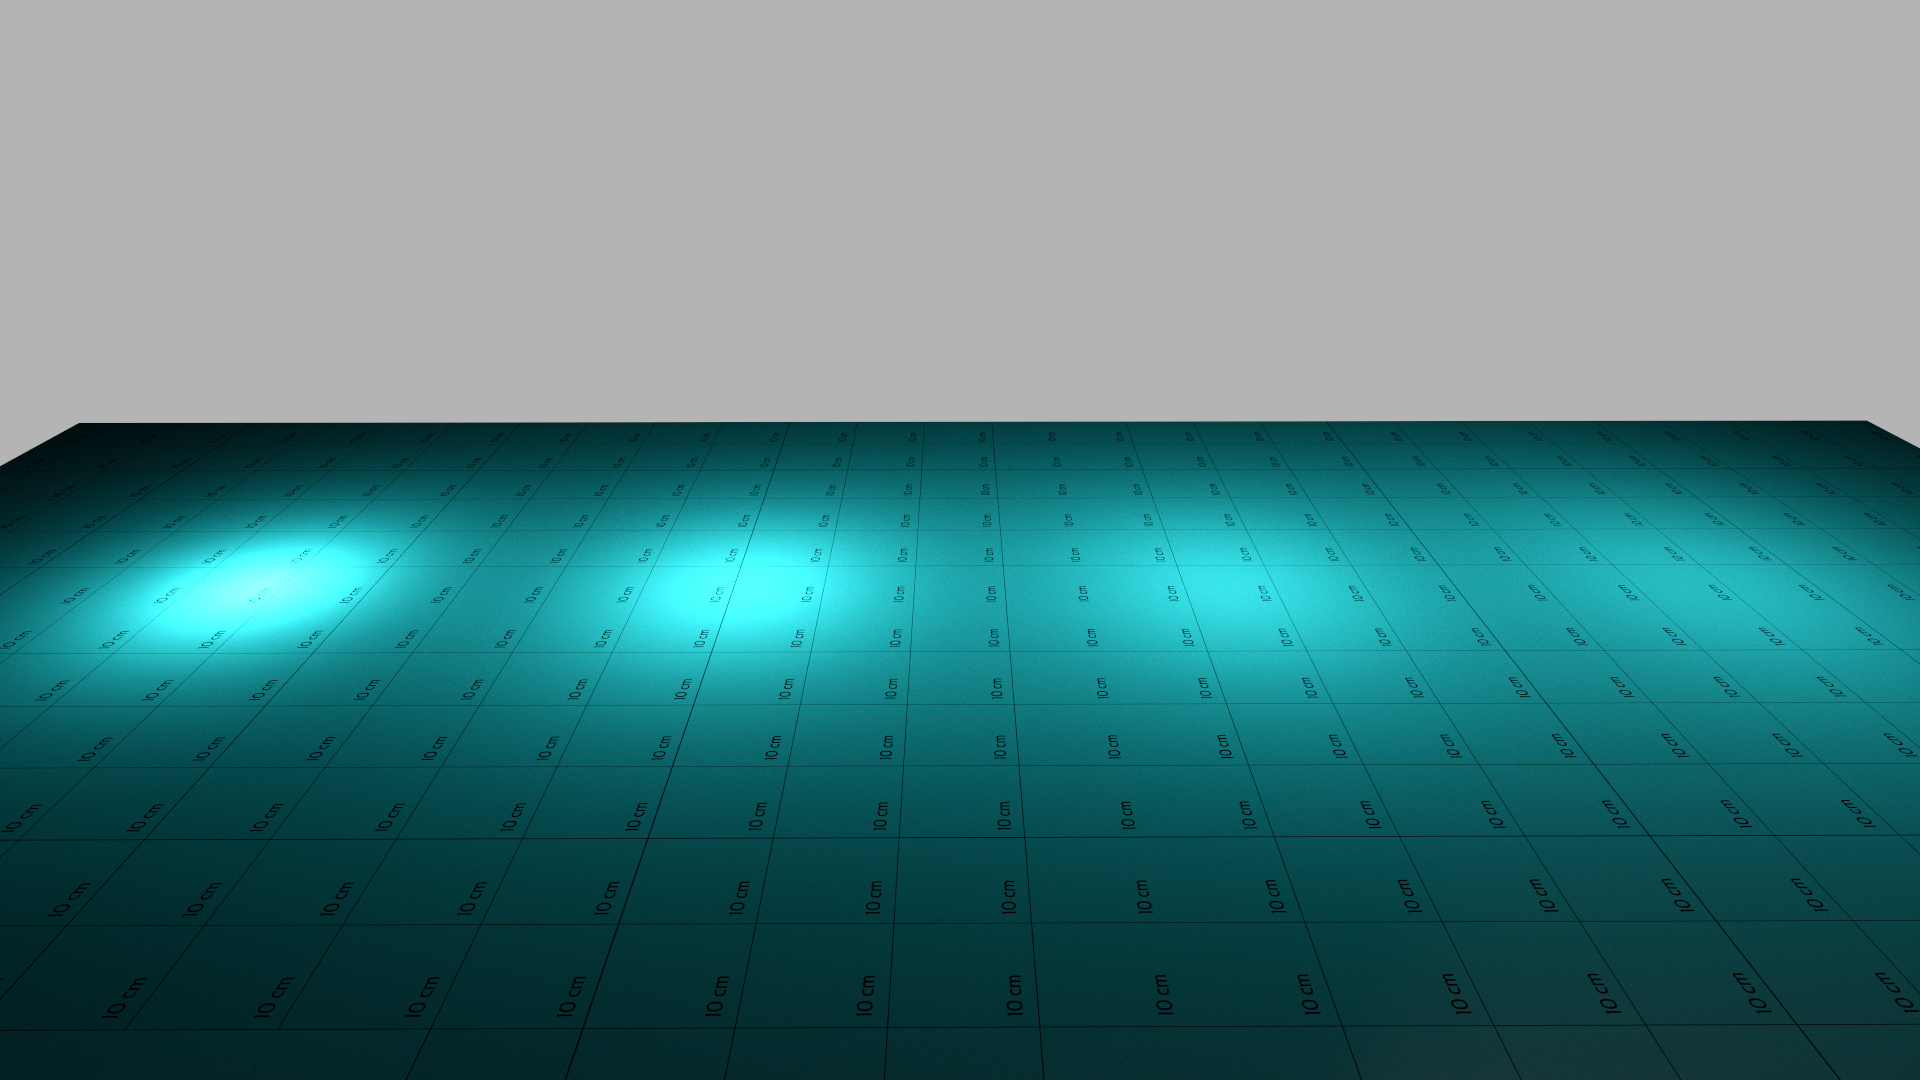 Iray illumination without light override | 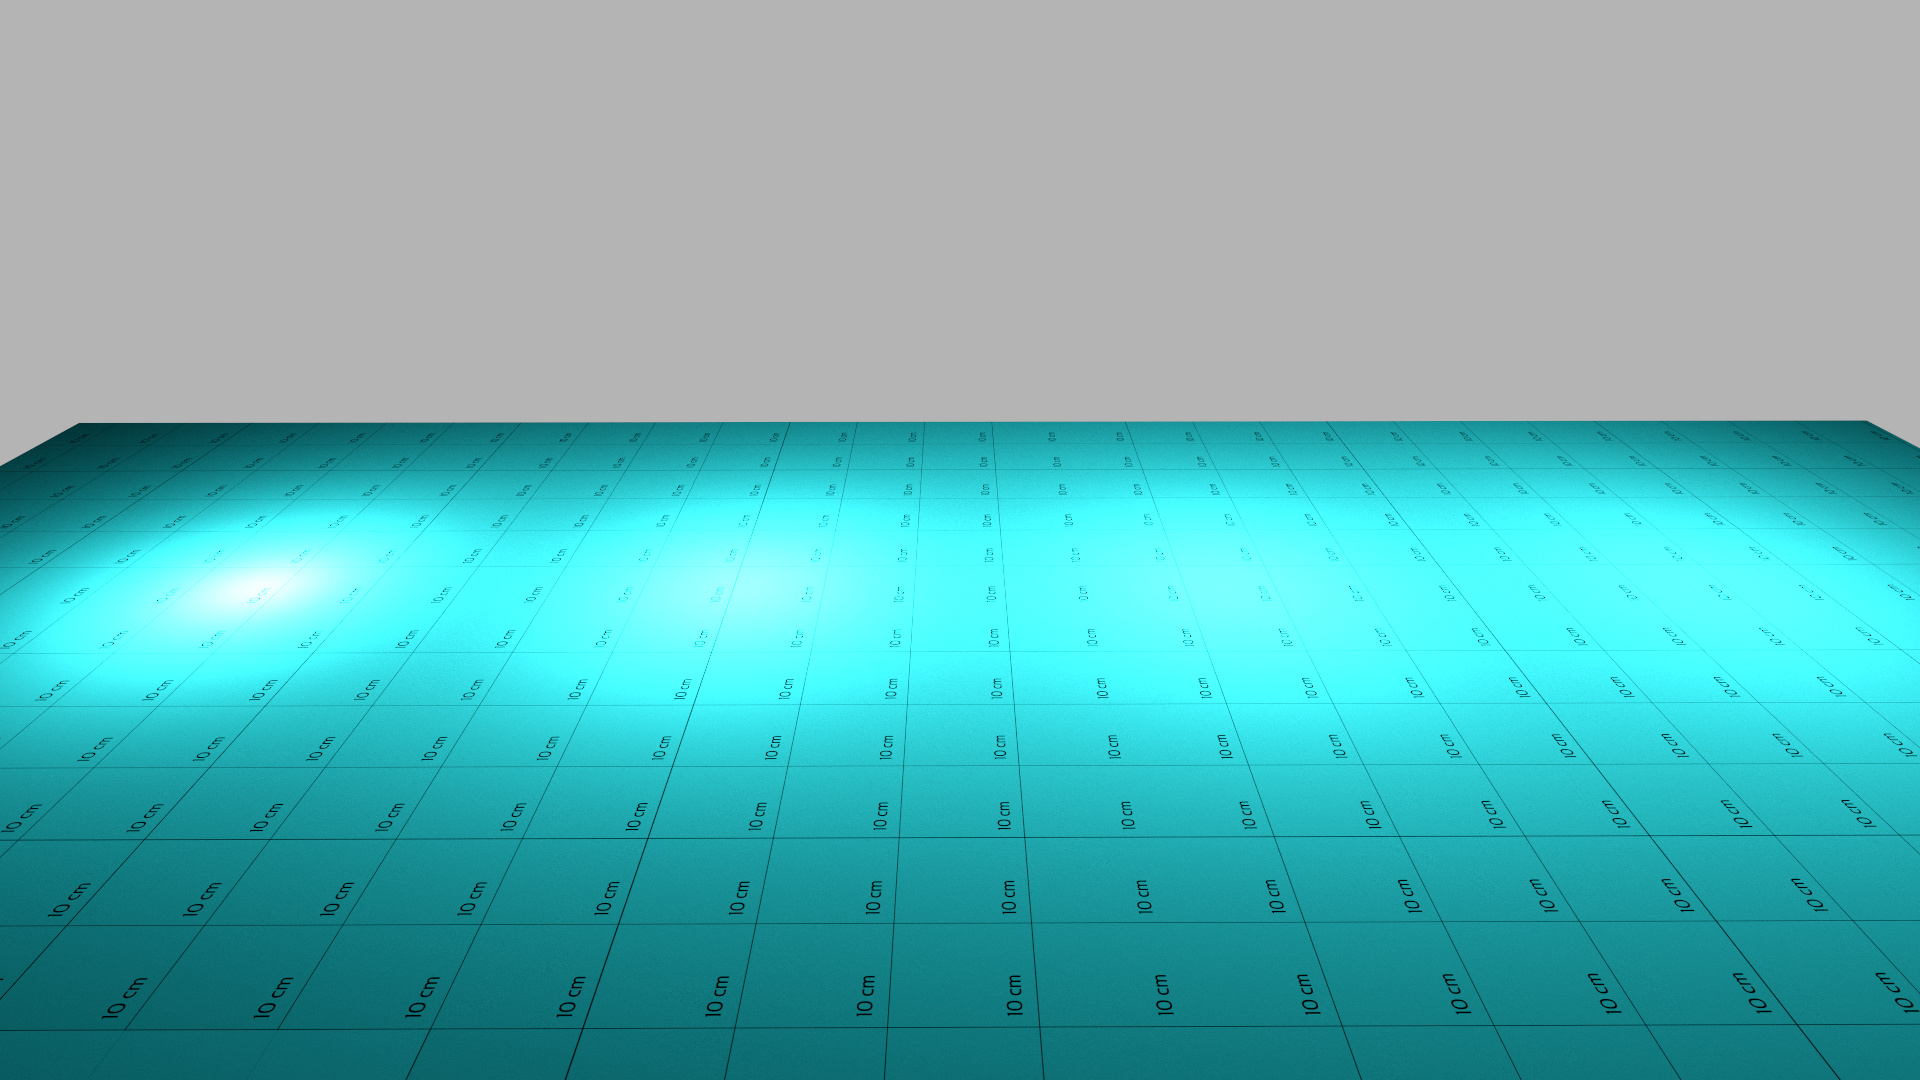 Iray illumination with light override, intensity 1 |
Sun and Sky tab
Tip
How to use the real-time Sun with Iray?
The renderings of the Iray Sun and the Real-Time Sun of Patchwork 3D are different. Depending on what you want to render, Iray Sun or the Real-Time Sun must be used.
If you enable the Sun from the Iray Settings editor, you override/replace the HDRI environment with the Iray physical sky/sun model.
The Iray Sun and Sky is convenient for interior architecture scenes, where a specific environment is not required (the environment of the scene can not be used at the same time as the sky and the sun ).
If you enable the Real-Time Sun from its dedicated editor you create in Iray only the shadow of the sun and you keep the HDRI environment to be suitable for the rendering of Patchwork 3D.
How to integrate an environment in Iray?
The Environment material of Patchwork 3D is not supported in Iray. To be able to see the environment in the scene in Iray rendering mode, some manipulations are necessary.
We must first create a camera from the Cameras editor
 and a sensor from the sidebar of Matter by following this path: Internal Libraries tab > Sensor Library

 , which must be assigned to the camera by dragging and dropping from the Sensor Library to the Camera editor
  .
.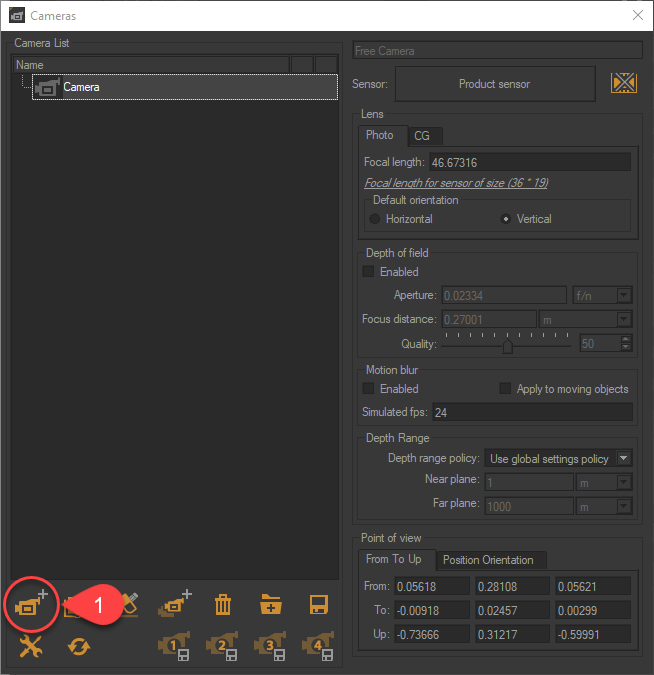
Creating a Camera
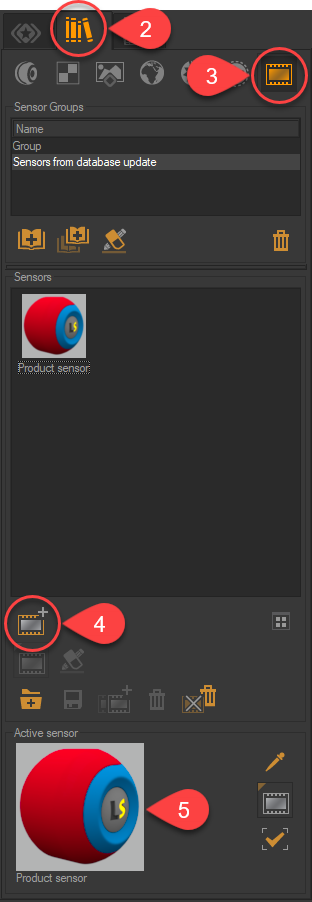
Creating a Sensor
From the Sensor Library, double-click the active sensor at the bottom of the sidebar to open the Sensors editor
 . In the editor, select Environment in the Background Mode.

Drag and drop the sensor just created into the Cameras editor.
Once this step is done, it remains to activate and adjust the parameter of parallax correction in the environment of the scene.
From Environment Library


 , double-click the active environment
  at the bottom of the sidebar to open the environment editor.
On the Parallax Correction tab
 , select the type of geometry
  . To make it easier to adjust the geometry scale, click this icon
  .
.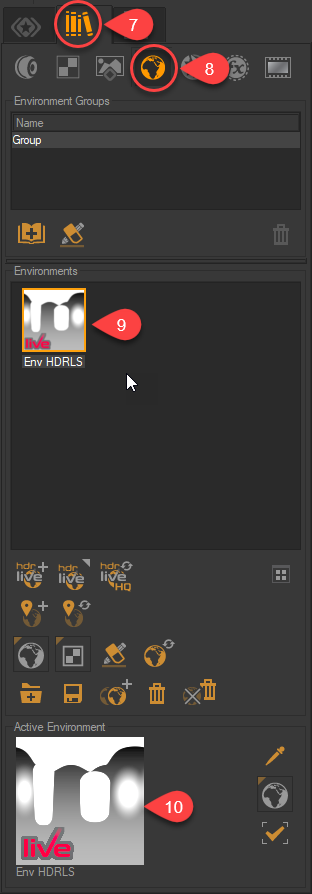
The Environment Library
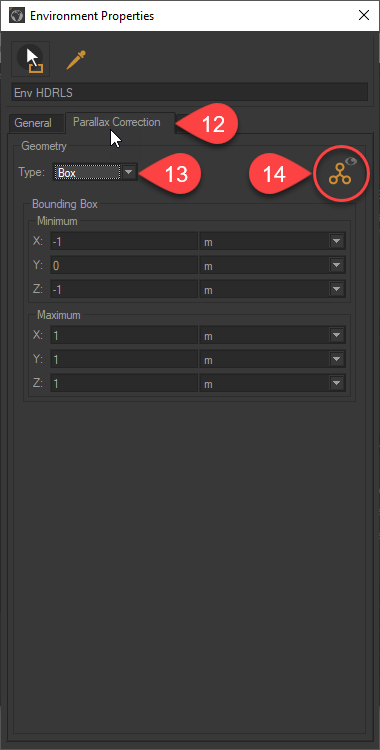
Assigning a geometry type to the environment