Generating Bookmarks from a Kam File
Available in: Matter : Editors menu > Cameras |
The frames in a *.kam file can be converted to cameras by the Cameras editor. To do this, at least one .kam file must already be loaded before you generate bookmarks.
To load a *.kam file:
Open Timelines under Matter > Editors menu > Timelines.
On the right-hand side of the editor, click on the Camera Animations library tab. Create a new camera animation using the New button below the Camera Animations list.
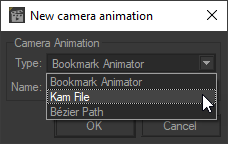
In the dialogue box that appears, choose the type Kam File. Validate this step.
Double-click on the name of the animation you have just created. The Camera Animations editor will open.
In the Kam Files zone, click on
 Import a Kam File. Select your .kam file and validate.
You can import several .kam files. You will be able to choose later on which of the open files you want to use to generate bookmarks.
To generate the bookmarks:
Open the Cameras editor: go to the Editors menu > Cameras.
Select the option
 to open a .kam file.
The Import Cameras window will open. In the first drop-down list, choose Import from kam file.
In the second drop-down list, choose the group in which the cameras will be placed. By default, the cameras that will be created will be placed at the root of the camera hierarchy. You can choose from among any of the existing camera groups.
In the drop-down Kam file list, choose the file to use. If you have opened several .kam files, they will all be shown in the drop-down list.
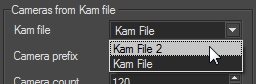
Choosing the .kam file to use.
The editor will provide a name for each new camera in the format <prefix_number>. By default, it proposes the .kam file name as the prefix. You can change the prefix in the Camera Prefix text zone.
Camera count is the number of cameras to be generated. Each frame of your .kam file can be used to provide a view for a camera. Consequently, you can generate, at most, one camera for each frame. You will manage the offset of the first camera and the frame spacing between cameras in the next steps.
By default, the first camera is created from the first frame of the .kam file. If you prefer to change this, use the sliding bar to offset the first camera.

Modifying the offset of the first camera.
Note
0 offset: the first frame will be used to generate the first camera.
N offset: the frame N+1 will be used to generate the first camera.
Use the Current camera preview slider to check each camera to be created. If you are not satisfied with the automatically calculated spacing, you can adjust the frame that will be used to generate each individual camera. Use the Camera adjustment tool to move each camera forwards or backwards in the frame sequence.
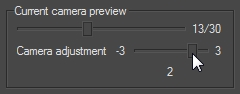
Adjusting a camera within the frame sequence.
Once all the settings have been adjusted, click Import to begin generating the cameras.