Alignment tool
Notice
This tool allows you to simply align selected objects in Shaper.
Depending on the number of objects to align, the alignment method differs slightly. Here are some examples of alignment.
Aligning objects to a reference object
Start by selecting the objects to align.
Click the icon
 in the toolbar of Shaper.
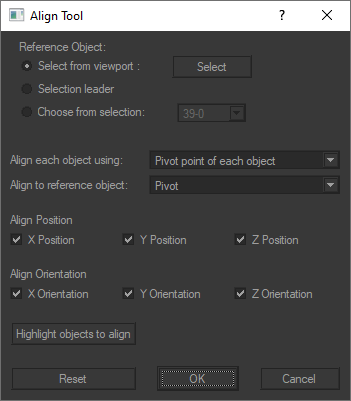
In the alignment tool window that opens, activate the mode Select from viewport then click the Select button.

Select the reference object to which the objects should align.
In the small window that appears, then click the Apply selected object as reference.
The reference object is added as a leader to the Shaper selection and is highlighted with white color.
Come back to the Alignment tool and choose parameters from the following: Pivot point of each object or the Center of each object to determine how the alignment of objects will be achieved. Then choose Pivot or Center of the reference object B on which object A must align.
Use the coordinates X, Y, and Z Position and Orientation alignment.
Note
The button Highlight objects to align makes it easier to identify objects to align in a complex model, even if you interrupt the alignment procedure by accidentally clicking on another object. This button helps you quickly find the objects you want to align, by highlighting them in your model.
To use it, just click on it. The objects to be aligned will then be highlighted, allowing you to resume the alignment procedure quickly and easily.
To finish, click the button OK to apply the alignment of object A to object B.
Aligning multiple objects to the leader object
Start by selecting the objects to align with each other.
Tip
The last object added to the selection will have the status of leader. If we select objects A, B, and C, it's the object C that will have the status of leader because the selection was made in this order: object A > object B > object C.
Selected surfaces are represented in a 3D viewport with green highlighting. One of the surfaces is designated as the leader. It is represented with white highlighting. The leader surface is used for various operations that require the identification of a single surface within the selection.
Click the icon
 in the toolbar of Shaper.
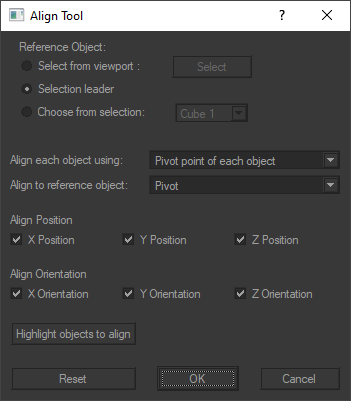
In the alignment tool window that opens, select the option Select leader.

Choose from the following: Pivot point of each object, Pivot of the leader of the selection, Center of each object, or Center of the selection to align objects A and B with object C.
Select how the alignment should be done with the Pivot or the Center of the reference object C on which object A and object B must align.
Use the coordinates X, Y, and Z Position and Orientation alignment.
Note
The button Highlight objects to align makes it easier to identify objects to align in a complex model, even if you interrupt the alignment procedure by accidentally clicking on another object. This button helps you quickly find the objects you want to align, by highlighting them in your model.
To use it, just click on it. The objects to be aligned will then be highlighted, allowing you to resume the alignment procedure quickly and easily.
To finish, click the OK button to apply the alignment of objects to the leader.
Aligning multiple objects by selecting the leader object in the selection
Start by selecting the objects to align with each other.
Click the icon
 in the toolbar of Shaper.
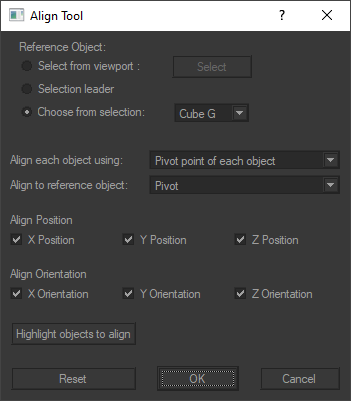
Select the reference object from the drop-down list in the Alignment Tool window that opens. It will serve as a reference for aligning other objects.

Choose from the following: Pivot point of each object, Pivot of the leader of the selection, Center of each object, or Center of the selection to align objects.
Select how the alignment should be done with the Pivot or the Center of the reference object.
Use the coordinates X, Y, and Z Position and Orientation alignment.
Note
The button Highlight objects to align makes it easier to identify objects to align in a complex model, even if you interrupt the alignment procedure by accidentally clicking on another object. This button helps you quickly find the objects you want to align, by highlighting them in your model.
To use it, just click on it. The objects to be aligned will then be highlighted, allowing you to resume the alignment procedure quickly and easily.
To finish, click the button OK to apply alignment to objects.